
Baxi 600 Combi
• 24kW, 30kW, and 36kW
• 24kW and 30kW LPG models available
• Compact cupboard fit
• Pipes behind facility within boiler casing
• Only 29.5kg lift weight
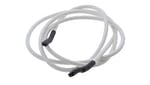
• Easy-Fill permanent filling link makes it easier for householder to top up system
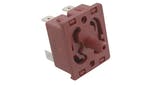
• Brass hydraulics block
• OpenTherm interface
• Compatible with uSense smart control
• Simple hanging bracket
• Choice of flue lengths
Number reviews: 121
Overal rating: 5
Review for Baxi 600 Combi by AJL
13th November 2022
Great boiler. In my opinion Baxi range of combi boilers are now leading the market above any other brands. They offer a warranty and if I’m correct we’re the first to offer ten year warranties leaving the other brands clambering to keep up. Mixed in with the Baxi works app on the phone it’s now even easier installing and registering boilers for customers.
Review for Baxi 600 Combi by Sb Heating And Gas Services
13th February 2022
Favourite boiler to install,Easy to use great warranty,Customers like design and brand name so it's a no brainer to me to install these where ever possible 10 year warranty is among best on market and in real terms baxi honour warranties unlike slot of leading nrands
Review for Baxi 600 Combi by Ian Winnard Heating & Plumbing
11th February 2022
Baxi latest boiler, is a replacement for the Duo tec range. Seems a good boiler slightly smaller than the duo. Fairly straightforward to fit, the only downside is that not just baxi they move flue over which can be a pain. When fitting like for like to the new model. Quiet operation time will tell if this is going to be reliable. Baxi provide excellent back to there warranty.
Review for Baxi 600 Combi by Eastside Electrical Services
10th April 2021
Great little boiler 7 year warranty you know it's well made this product even looks alright I would recommend this product to anyone. And price is not bad at all
Review for Baxi 600 Combi by Tempergas
4th April 2021
Good bit of kit simple to use easy to install fits in to a cupboard as it’s compact. Also very quiet when in operation and it comes with a fantastic warranty.
Review for Baxi 600 Combi by RDS Plumbing Ltd
21st February 2021
Great boiler to install.
Very compact can fit in a cupboard easily.
Great guarantee and the added bonus of Baxi
Sending out reminders every year.
Fitted about a hundred of these with only one boiler that had an issue.
Very quite as well
Only one thing is that there is no hot water preheat.
Review for Baxi 600 Combi by DPJ Plumbing, Heating and Gas
17th February 2021
Very good boiler for the money. Very easy to install and setup. All my customers have been happy with their Baxi 600 boilers. I rarely have to deal directly with Baxi but when I do their customer service has always been very good for me. Top boiler, top company.
Review for Baxi 600 Combi by Preston Plumbing Services
13th February 2021
I've found the baxi 600 series very easy to fit, it looks smart aswell when on show, very light, quiet boiler
The build quality is superb, very easy to maintain and service
Overall I would give it 5 stars
Review for Baxi 600 Combi by MMG Heating & Plumbing Services
11th February 2021
Absolute brilliant bit of kit, smart, stylish, slim, perfect for kitchen cupboards, probably the most popular boiler I fit at the minute, this and the 800 series are a no brainer with the warranty that get and the fact they are super easy to install.
Review for Baxi 600 Combi by Westhill Boiler Services
4th April 2020
Our number one boiler of choice......
lightweight, good build, fits into kitchen cupboards, long warranty, great price, what’s not to like?
Review for Baxi 600 Combi by John Bennett Heating Limited
12th February 2020
An amazing compact design boiler with the great addition of being able to take pipework behind the boiler with out needing to space the boiler off the wall.
Easy to use for any age of customer and all round a great boiler.
Review for Baxi 600 Combi by Cliff Plumbing & Heating Limited
30th December 2019
Very good build quality for the price. The pipes behind boiler facility is very handy when in tight cupboards. Can fit in a standard kitchen cupboard always a bonus.
Easy to fit & nice boilers to service.
Baxi is a trusted brand, with a very good installers scheme and great technical help if required. They look after their customers.
Review for Baxi 600 Combi by BSL Plumbing & Heating
18th October 2019
My preferred boiler, even installed a 600 in my house. Cupboard fit, pipes can go up the back, ss heat exchanger, brass and copper parts. Also has opentherm which means if you install with a nest, the nest will use all of the features, unlike when connecting to Worcester or Vaillant. Now the 600 range has extended into system and heat only.
Review for Baxi 600 Combi by D L Plumbing and Heating
19th September 2019
Good quality item that's good for compact boiler installation and very good maintenance friendly work , highly effective and efficient, would fit on most jobs that require rear piping
Review for Baxi 600 Combi by Connor's Heating Solutions Ltd
14th August 2019
Brilliant boiler, easy to install and work on. Baxi has put good thought into the design and ease of access. All in, Baxi have done better with this than some other manufactures have with more 'premium' boilers. Also comes with a great warranty.
Review for Baxi 600 Combi by Minty Property Developments
8th August 2019
Best small combi on the market. The 636 is the best cupboard fit boiler producing a massive 15l/pm of hot water. This competes with some larger combination boilers. My number one go to combi boiler.
Review for Baxi 600 Combi by AMC Heating Services
3rd August 2019
The Baxi 600 combi is a really great boiler. It's good value and comes with tried and tested components. Plenty of good quality brassware and neat styling. Baxi have put a lot of thought into this boiler and it shows. They even provide the screws and plugs to hang it! The instructions are much better than most and cover everything you could ask for. With a seven year warranty and all of these features, this boiler is definitely worth fitting.
Review for Baxi 600 Combi by Gas Solutions Gas Services
26th July 2019
Quality parts fitted as standard, mix of both nylon composite and copper and brassware. Simple easy visual display, also backlit for the harder to fit places. Diagnostics as standard. Features are standard Baxi as expected. Mid priced but getting a great warranty period for the customer and hopefully the installer.
Review for Baxi 600 Combi by NDB Gas Services
26th July 2019
Fantastic quality of build. Really well thought out design, apart from PRV maybe, overall a fantastic boiler. Can't rate it high enough. Across the range they have really thought about the little things such as no permanent live for heat only, even down to showing cable lengths required. This isn't a big thing and can be done without but it shows the level of detail Baxi go into. The thought process that has gone into the 600 range is phenomenal - the weight of the boilers, the ease of fitting the IFOS, the simplicity of the customer controls across the whole range is such an installer and users dream. Obviously the value for money all depends on where you buy the boilers from, this is an issue I've found and something I personally feel needs addressing with across the board prices, although this isn't Baxi's fault. But on the whole the value for the quality of materials used and build quality is by far the best in my opinion, on the market.
Review for Baxi 600 Combi by Boiler check ltd
26th July 2019
Brass inside lightweight easy to use filling loop looks good. Simple controls - not overcomplicated and has everything you need with easy access. Quality build warranty and easy fit.
Review for Baxi 600 Combi by Mckibbin plumbinh
26th July 2019
The 600 is a sturdy boiler, lightweight but still has the quality of brassware. Simple to use and has everything you need. Value for money as you get what you pay for - quality!
Review for Baxi 600 Combi by KJS Plumbing and Heating
26th July 2019
Easy to install, simple to operate for the end user. Easy to commission and great connectivity for extra energy saving controls. The price seems fair based on the quality. It could be improved however as the hanging bracket is very flimsy. The flexi pipe to the expansion vessel is problematic due to angled connection and restricted bore.
Review for Baxi 600 Combi by Maintain-Heat Ltd
26th July 2019
Easy to install and operate. Good lift weight and cupboard fit so ticks most boxes. Works brill with the Nest and Baxi Usense smart stat and ifos. Very easy to use and economical system. All brass internals with stainless steel heat ex
Review for Baxi 600 Combi by Penfould Heating & Renewables Ltd
26th July 2019
Light weight, compact but enough space to work in; solid little boiler. Baxi have stayed away from the 'pressy buttons' of the previous GA and Eco Blue models, nothing more simple to use than a turny dial! Good hot water flow rate, lots of add ons available, works well with the Baxi Usense controller. Easy fault identification. 7 years warranty, modern boiler with good features, easy and reliable all for under £900.
Review for Baxi 600 Combi by Core Heat
26th July 2019
Brilliant boiler easy to install and work on. It's just so easy to use for me but more importantly for the customers. It's got all the features needed and the price is brilliant compared to other boilers - and the Baxi is better than them!
Review for Baxi 600 Combi by C. S. G Heating
18th July 2019
Very good boiler, easy install a recommendable boiler but all baxi products are of high standards, would recommend the 600 to anybody
Review for Baxi 600 Combi by Bean Plumbing & Heating Services
17th July 2019
Very good boilers. Reliable with a 7 year warranty. Easy to use for the customer with simple controls.
Nice and compact so will fit in a kitchen cupboard and not subsequently not heavy to lift onto wall. Opentherm compatible for connecting to smart controls.
Only downside is cost as they’re not budget boilers but you get a good boiler for what you pay.
Review for Baxi 600 Combi by Gas On Sea
17th June 2019
Favourite boiler on the market for us, this is our go to mid range choice of boiler. Light weight with easy installation. ifos weather compensation makes for easy boiler plus option. Great value for money
Review for Baxi 600 Combi by SW Plumbing & Gas Ltd
14th June 2019
Preferred boiler of choice to install
Nice and light
Easy to use
Compact fits in the kitchen units
Review for Baxi 600 Combi by Gordon Herd Plumbing & Heating Services
14th June 2019
My go to boiler.installed close to 100 of these with absolutely no issues.
Very lightweight but with everything an installer and service engineer will look for in a boiler.
7 year warranty and a great price with a great back up from baxi.
Review for Baxi 600 Combi by MLD HEATING
1st June 2019
The best boiler on the market, 7 year warranty out the box so you know the manufacturer has faith in the product, opentherm compatible so it can be used with the leading smart thermostats and use there full potential, aftercare is second to nonem
Review for Baxi 600 Combi by CHplumbing
17th May 2019
Brass inside, fits in kitchen cupboards, quiet, good warranty. Simple controls and features are simple to use. It's good value but some customers still prefer budget boilers.
Review for Baxi 600 Combi by Scott White Heating & Plumbing
17th May 2019
Size and weight of the boiler and easy to work on. Electrics can be a bit awkward centralised flue makes boiler swaps easier. Really easy to use simple controls very basic to understand. Filling valve very useful and external controls easy to use. Some great prices out there at independent merchants on the 600 would highly recommend.
Review for Baxi 600 Combi by Glennon plumbing services ltd
17th May 2019
Still all brass, very compact and lightweight. Dials are easy to use and understand. Opentherm compatible but not with all units. Great price for 7 years
Review for Baxi 600 Combi by Gas-Tec Plumbing and Heating
17th May 2019
Quality components made of brass, built in Britain. Simple controls and set up. Great technology with open therm making it easy to meet boiler plus. Simply the best boiler on the market.
Review for Baxi 600 Combi by B H heating solutions
17th May 2019
I really liked the boiler easy to install nice and light, the only niggle I have was the flue sensor doesn't clip on very well and comes off really easily. Very easy boiler to use no faults at all with that. It doesn't have many features but for that it makes a good boiler for many people who don't do computers to fight tech stuff. Good value for customers on a budget.
Review for Baxi 600 Combi by Sunrise Plumbing & Heating
17th May 2019
Baxi have developed a compact boiler that stands off the wall allowing it to run pipes behind the boiler. Keyless filling loop for one, clear simple display not over complicated for the end user. Brass quality parts. In my opinion there is no better boiler on the market offering all the features the 600 series offers.
Review for Baxi 600 Combi by D.A Gas, Heating & Plumbing
17th May 2019
All brass inside, easy to access, well thought out design and made with quality components. The controls are really simple to use and customer friendly. The features are simple and it's missing some from other boilers so would get 5 stars if it had more. The price is competitive with others at that level.
Review for Baxi 600 Combi by Pipeline Plumbing Services Ltd.
17th May 2019
Stainless steel heat exchanger and brass components give me peace of mind when recommending these boilers. Easy and simple display. I do find the deaeration function fiddly, but other than that it is very easy to use. Open therm and compact makes this a great boiler for most domestic homes. Good price for great features.
Review for Baxi 600 Combi by SJL Plumbing and Heating
17th May 2019
Small quiet boiler with no huge amounts of plastic components I have noticed. Well priced with a good warranty, quite like the freedom of not having a fixed jig in most situations although it had its uses on the Duo-tec. Lately I've been needing boilers with rear piping ability and these are ideal. Lovely light boiler easy to pipe except for the PRV. I'd suggest providing installers with a pre bent pipe that takes it across the back wall and hooks down to the far right of the boiler when not rear piping. Wiring is still an issue for me as I know they have updating the wiring block so I can wire my receiver into the boiler but I still find that with the two cables run in the magnetic door doesn't hold on the front. Price and warranty is good - still reasonably priced up to 36kw.
Review for Baxi 600 Combi by LJB Gas and Plumbing
17th May 2019
It's based on the Duo which is a solid boiler. Ease of use at 5 stars as there is only 2 dials can't be much easier. Weather comp, open therm, real pipe ready. All things an installer wants. Top quality boiler, medium price.
Review for Baxi 600 Combi by DLM GAS Ltd
17th May 2019
Stainless heat exchanger. Decent quality components. Not a fan of composite blocks though. I rated the ease of use at 4 stars because because it's simple, this has it's advantages and disadvantages as it is a basic interface with minimal functionality. Baxi sells this as an opentherm boiler and it isn't. Its compatible with their own usense or Nest. Value for money at 4 stars as it is cheap, compact and sturdy.
Review for Baxi 600 Combi by Plumb CO
17th May 2019
Brass and copper internals, only thing stopping it being a 5 star was the blow off position and electrical terminal blocks. Customers have however complained about not having much control over the boiler and the reset button sticks in or doesn't work. Adding a display like with the Ideal Logic or Vogue would be great. Decent boiler for the money but Ideal have given longer warranty on a similar priced product.
Review for Baxi 600 Combi by 68° Heating
16th May 2019
Love this boiler! BAXI have taken the brilliant duo tec an improved it an compacted it to this little 600! Always recommend the 600 range to my customers an they are never disappointed with the results
Review for Baxi 600 Combi by T Brown Heating Solutions Ltd
21st April 2019
Baxi have knocked another quality product out. Fitted a few of these now and absolutely love them. Having the ability to pipe up the back as standard is brilliant and have used its capabilities a few times. They have seemed to fix the issue with the front panel not staying up and the the PRV is a bit tight but easy enough if you do it first.
Review for Baxi 600 Combi by Pavlou Plumbers
13th April 2019
As an installer they are simple to install. As this boiler has OperTherm technology the energy effeciency is excellent when using smart controls. If the customer would like the more basic controls being compliant with boiler plus is made simple with baxi's clip on outdoor weather sensor. Servicing this boiler is one of the easiest to do as well, as are most of the Baxi range.
Review for Baxi 600 Combi by ID Plumbing + Heating Ltd
12th April 2019
Great neat wee boiler and fits great it kitchen installs.
Nice to see back to a central flue.
Feels good quality and solid construction unlike some equally priced boilers.
No problems so far with any installed hope it matches up to Duotecs long term.
Review for Baxi 600 Combi by DL Gas Services Ltd
10th April 2019
Wow these new Baxi 600 series are the best quality boiler on the market at the moment. Ideal if a customer what's them in a cupboard etc excellent to service as well for the engineer at DL Gas Services Ltd we love them ❤️❤️
Review for Baxi 600 Combi by Weston Gas Services Ltd
10th April 2019
Baxi have done a great job with the 600 series of boilers, developed listening to installers and service engineers. It makes full use of brass components from previous tried and tested models. Good value for money and customer support is excellent, easy to install, commission and service.
Review for Baxi 600 Combi by i-Fix Gas & Heating
8th April 2019
Outstanding boiler, reliability and value for money. Made with good old brass and copper. Fitted many of these boilers, installation is easy as well as commissioning.
Review for Baxi 600 Combi by S3 Heating and Plumbing
23rd February 2019
Baxi 630 was my first ever install and I walked away feeling confident that it was a perfect install. Have fitted several of these and a 624 ever since. Love the fact that you can install pipework up the rear and even get a prefabbed pipe kit for the rear too. The boiler has been designed around engineers and it shows. So simple to take apart too if it ever needed to be repaired. The integrated filling loop had some issues during the first batch but now they sorted and work a dream.
Review for Baxi 600 Combi by MasterGas Heating & Plumbing
2nd February 2019
An absolutely cracking boiler and a dream to install. Very easy to use and set from a customers point of view and not only are the a solid boiler with quality parts and fitting but they are light and also very quiet.
Have fitted many over the past year and they are Always out first choice to install.
Review for Baxi 600 Combi by Prenton Plumbing Service Ltd
13th January 2019
Fitted my 1st Baxi 630 recently after hearing good things about them , I got to say I really liked the boiler , easy install, rear pipe access option , easy t
commissioning
Warranty registration through Baxi works was a doddle
Get a thumbs up from me and will be fitting more in the future
Review for Baxi 600 Combi by Applethwaite Heating
6th January 2019
Very small, very light, easy to fit. Great build quality, all grass and copper, customers love them as they do fit in kitchen cupboarda
Review for Baxi 600 Combi by Wakefield Boiler Services
31st December 2018
At present top of the marks for the boiler. Technically an improvement on the duotec \ platinum range, smaller lighter still has great features with the added technology of using open therm. Hopefully it will go large on the warranty up to 10 years to really compete with other products on the market but at present, very impressed with the 600.
Review for Baxi 600 Combi by Approved Technical Services Ltd
29th December 2018
This is a great little boiler, the out door flue sensor just makes boiler plus really easy
The wires clip neatly inside the casing, just 2 a wire connection
The boiler controls are straightforward
Build quality excellent with a 7 year warranty
My 1st choice
Review for Baxi 600 Combi by Globe Heating ltd
24th December 2018
We absolutely love this gem of a boiler. We have installed almost a hundred and they go in like a dream. There compact cupboard fit size and low lift weight make them very versatile for a multitude if installation locations. I have installed a 636 in my own home and can say for sure they are very quiet boilers. The build quality is immense with the stainless steel heat exchanger and brass hydroblock. Servicing and maintenance looks great for tje future with every part being available from the front of the boiler. The easy fill filling loop makes easy for to tell customers how to top there system pressure up saving me time. Fantastic warranty support too. This is our first choice of boiler now.
Review for Baxi 600 Combi by Raistrick Gas
12th December 2018
I’ve been fitting the 600 for 18 months now and I couldn’t be happier, as an engineer for 20 years this is my favourite boiler, light weight cupboard fit and user friendly my first choice every time
Review for Baxi 600 Combi by Impact Heating Solutions
12th December 2018
This is a great little boiler from the Baxi range. The 7 year warranty certainly helps sell it along with the fact the main water components are of brass and copper. The only thing to look out for as an installer is the PRV and having to do that first but it’s a minor issue to resolve. The user face is simple to understand for the end user and the filling link makes for easy system pressure topping up.
Review for Baxi 600 Combi by AOC Plumbing & Heating Services
10th December 2018
Fitted 3 of these so far. Can't fault them. Lightweight and easy to install, you can't go wrong. Looking forward to fitting first 636 soon!
Review for Baxi 600 Combi by Bells Heating
7th December 2018
Fitted my first 630 the other week & the customer absolutely adores it.
They love the fact the boiler has the capability to be controlled via their mobile phone! It provides heating & hot water very fast, it's also quiet.
As for me, i love the build. Its very light for combi & the instructions are very clear. The dearation mode is also good. After taken advice from other engineers i noticed the PRV can be a bit tight but other than that boiler is beautiful to install! Deffo recommend.
Review for Baxi 600 Combi by Matthews Heating Ltd
1st December 2018
Absolutely love fitting these boilers. I find them very light and very quiet. And a bad note I feel that baxi could make the access for cables easier and make the prv pipe /connection better.
On a whole this boiler is very good.
Review for Baxi 600 Combi by Andrew Sexton Heating Maintenance and Repair
1st December 2018
Fitted my first 630 and was left mainly underwhelmed. Glad I had read about doing PRV first as this is very poorly thought out. The magnets on the front panel are very weak, just not sure I will fit any more.
Review for Baxi 600 Combi by Boiler Medic North East
1st December 2018
So the 600
It’s an ok mid range boiler ok to fit the prv is fiddling on but you just need to do it first
No actual plug shd play on board controls and pre wirer witch is a let down.
Over all it’s an ok boiler time will tell how it holds up
Review for Baxi 600 Combi by Gasrite
30th November 2018
I always ensure the 600 range is included as an option in every combi quote I do. Value for money, easy to install and use, and with the 7 year warranty it's up there with the best
Review for Baxi 600 Combi by Hanbury Plumbing and Heating
30th November 2018
Since this boiler came out about a year ago I’ve tried to fit nothing but (if it suits). Great value for the money. Has open therm connections so works perfectly with nest internet stat. Cupboard fit and hidden pipework makes it a great little boiler with now the options of a big engine.
Review for Baxi 600 Combi by David Hainey & Co
30th November 2018
I have not fitted a Baxi boiler for over 20 years. On this particular install it required a boiler to fit into a customers existing position in a kitchen cabinet. So I looked at the boilers that would fit and chose the 600. All was well for the first 3 months the the customer called to say water was leaking from the inside of the boiler called Baxi and they attended to fix. Long story short liked the boiler.
Review for Baxi 600 Combi by Elements Heating Installations
23rd November 2018
Love this boiler, nice and easy to fit with plenty of options, great size considering the amount of room inside to work on it. I fit these on a regular basic and had no problems
Review for Baxi 600 Combi by Stour Valley Plumbing
22nd November 2018
First class product, quality components, very easy to install and commission. Small and lightweight design, will be fitting many more of these boilers, good range of outputs
Review for Baxi 600 Combi by B N PLUMBING
15th November 2018
100% my boiler of choice. Try my best to promote them. Once the prv is changed it’s a perfect boiler. Now there’s a higher kw, there not many houses they can’t be fitted in
Review for Baxi 600 Combi by Walkwood Plumbing & Heating
11th November 2018
As a Baxi installer this is my preferred choice of boiler, only niggle issue that you have to put the valves on before hanging the boiler other wise to tight underneath, how ever great boiler no problems with them
Review for Baxi 600 Combi by 3T Gas maintenance Ltd
5th November 2018
As a bai installer we highly recommend these boilers we’ve fitted a few are very impressed with them , great value for money and good follow on from the duotec
Review for Baxi 600 Combi by Scott and Neave
4th November 2018
Absolutely amazing piece of kit . Performance is great they are light and versatile to install . Wiring is a doddle .
Easily a one man lift . My new preferred roof space boiler
Review for Baxi 600 Combi by S & L Plumbers
1st November 2018
Fantastic boiler, so installer friendly and all at a lovely price. Would recommend the telescopic flue though buying it though as makes the install even easier
Review for Baxi 600 Combi by Hamill Plumbing & Heating Ltd
28th October 2018
The Baxi 600 is the easiest boiler I have ever fitted. Customers love the compact and clean look. The hot water delivery is excellent. Wiring can be a bit fiddly but if you use 0.75mm cable it’s nice and easy. Apart from that no problems with the install at all.
Review for Baxi 600 Combi by AMR Heating Solutions
5th October 2018
Great compact boiler and really light. Easy to install and easy pipe behind. Recommend for a tight space
Review for Baxi 600 Combi by PG Plumbing
2nd October 2018
Have fitted a good few 600’s now and really like the boiler
Easy to install , quiet . Love the rear pipe option
Had a couple of reset buttons that were stuck in but on whole great boiler
Review for Baxi 600 Combi by McGrath Heating Services Ltd
26th July 2018
I’ve fitted a few of these boilers now I’ve found there very well built wth copper and brass hydraulics easy to install with a hanging bracket and an option to fit pipes down the back without the need of additional fixing jig nice easy user interface that customers like easy to commission and with a 7 year warranty great boiler at a good price will be fitting more of these
Review for Baxi 600 Combi by Murrayfield Plumbing and heating
22nd July 2018
Great little boiler. I can't believe it took Baxi so like to put this together. Game changer for compact boilers
Review for Baxi 600 Combi by M Brierley Plumbing Limited
15th July 2018
I fitted a 600 30kw a few weeks ago.
Easy to fit,
Will be easy to maintain and service in the future.
Baxi works app is fantastic.
Really pleased with how easy this boiler is to install.
Review for Baxi 600 Combi by Carters Plumbing & Heating (SW) Ltd
4th July 2018
Found this to be a fantastic boiler in most ways. Only downsides are the prv is very awkward. Also the terminal connections for the cables are far too small, makes life very hard when making connections using flex.
Review for Baxi 600 Combi by P How plumbing and heating
23rd June 2018
Brilliant little boiler, lightweight, cupboard fit,rear pipe if needed, brass internals, great price, quiet
What more do you need from a boiler
Review for Baxi 600 Combi by SJE PLUMBING SERVICES
22nd June 2018
I have just converted over to Baxi from Ideal. Their warranty and customer service is second to none. I’ve fitted 5 of these so far and think they are awesome. No complicated features, light to lift and easy to set up. Fitted with the IFOS, that’s Boiler plus covered!
Review for Baxi 600 Combi by Globe heating
22nd June 2018
Build quality at its finest at a superb price. Small and compact and quiet in operation. Baxi support team is also a cut above leading competitor's. Our boiler of choice at www.globeheating.co.uk
Review for Baxi 600 Combi by G And C Gas
21st June 2018
Head and shoulders above any boiler on the market.Easy one man lift. Pipes up.the back of boiler without added stand off jig.
So easy to service and work on.
AND it's bullet proof.
So much more reliable than the plastic rubbish
Turned out by Worcester.
Review for Baxi 600 Combi by Shire Heating Ltd
21st June 2018
very good addition to the Baxi range. well made and thought out. easy installation and operation. value for money and hope fully bring out a bigger version.
Review for Baxi 600 Combi by K&J Plumbing Ltd
19th June 2018
excellent boiler so quite,filling the system is a great idea
nice size a lot of the duotec good points enhanced,with the warranty and backup its another baxi winner
Review for Baxi 600 Combi by DCB Plumbing & Heating
14th June 2018
Since the new Baxi 600 has been launched it has being my number 1 boiler of choice.
With a fantastic 7 year warranty And excellent build quality, backed up with Baxi' legendary back up service, it has been easy to recommend the best boiler from the best boiler manufacturer.
Full metal build quality, easy installation, pipe up the back with out needing a stand-off kit.
I am a Baxi Approved Installer and this new boiler has proved I made the right decision choosing Baxi over 2 years ago.
Review for Baxi 600 Combi by A.G.Mallinson Gas, Plumbing and Heating Ltd
29th May 2018
Baxi 600......after a few known teething problems, I’ve fitted around 10 of these lovely little boilers. Quite lightweight, easy to hang on the bracket and easy to pipe up.
Love that it is back to center flue and easy to commission and set up. Open therm technology is excellent for the customer but even after teaching them how it works, they just can’t grasp it.
Overall I’d have one of these boilers in my own property, and will do when my current boiler breaks down completely.
Review for Baxi 600 Combi by Greenside Plumbing & Heating
29th May 2018
A really nice boiler to install, nice and small in size but still looks like there’s enough room inside for future service and repair. Glad to see that Baxi have stuck with dials on the front as well and not opted for buttons, it makes it that much easier for some older users to get to grips with. Not sure if it’s in the same territory as the Duo-Tec/Platinum, only time will tell, but it really is a good boiler. Good price for a good product and good that they’ve made a 30kw version available.
Review for Baxi 600 Combi by BTU Gas Services Ltd
29th May 2018
Great boiler, easy to fit and lightweight.
The central flue makes it good for the replacement market and it will fit into kitchen cupboards easily.
PRV needs connecting first as it is at the back.
A doddle to wire up either 240v switching or opentherm.
Review for Baxi 600 Combi by The Boiler Engineer Ltd
29th May 2018
A very nice boiler that will suit all requirements, built in Britain, with great service and back up from the manufacturers, Baxi is a brand that can be relied upon with other 100 years in the industry
Review for Baxi 600 Combi by HPE Services
3rd April 2018
This has got to be one of the best boilers Baxi has produced. Light weight, all brass hydraulics and stainless steel heat exchanger. Easy and quick to install, even fits in a cupboard without any fuss. Centre flue makes combi swaps easy work.
Got to be the contender for the duo tec crown.
Review for Baxi 600 Combi by Central Gas WM Ltd
23rd March 2018
I'd go as far as saying this has to be 1 of the best cupboard fit boilers on the market. Having the flue in the centre makes it an easy exchange of boilers and it has a built in rear piping chassis so the pipe work can be run at the back of the boiler. Cant see servicing or repairs being a problem in the future due to the accessibility.
Review for Baxi 600 Combi by J.holden plumbing and Heating
25th February 2018
Overall good build of boiler good build for maintaining. Few issues with filling loop driving and bracket for hanging boiler isn’t as easy as 400
Review for Baxi 600 Combi by Daniel white
23rd February 2018
Baxi 600 fitted 2 so far great boiler break downs in few years will be great easy to work on plate to plate accessible from front great boiler
Review for Baxi 600 Combi by Laing's Gas plumbing & heating
23rd February 2018
Good boiler with good components inside. Prv is a bit awkward and connections underneath are a bit tight but other than that it’s a overall good product
Review for Baxi 600 Combi by ming's local plumber and cooler
23rd February 2018
Baxi make good boilers. There a bit behind on some tech but there getting there. I went along to a day about there new boilers (sales day) but there nice little things easy to take apart and service. I didn’t cut my hand once
Review for Baxi 600 Combi by Gas & Heating Services
23rd February 2018
Great compact, light boiler, centre flue again at last and the space behind for pipework is a real bonus.
Just wish they had a ten year warrenty and a higher output one, let’s see what the future brings
Review for Baxi 600 Combi by East Anglia gas service Ltd
23rd February 2018
So far this year we have fitted 2 baxi 600 1 24kw and 1 30 kw .Having a center flue is a great help if you are replacing an existing boiler . We found the size and weight much easier to handle and not having a backplate it's quicker to install.
Servicing the boiler we have yet to experience but I can't see any problems
One anomaly found was the wiring diagram inside the plastic cover is different to the installation instructions.
Roger
East Anglia gas service Ltd
Review for Baxi 600 Combi by R.Baker
23rd February 2018
Great compact boiler which is easy to fit and is very quiet! Love that you can run the pipes down the back of the boiler without the need for a stand off kit!
Review for Baxi 600 Combi by HD Heating
23rd February 2018
Lightweight combi boiler. Easy to install upward pipe as standard no need for stand off kit! Great valve for money. Easy to explain to customers on how to use
Review for Baxi 600 Combi by C.R. Gas Services
23rd February 2018
Fitted a couple of these boilers now for customers who are on a budget. Light weight, easy to install and easy for the customer to understand. Very reasonable on price with a centre flue. 3 year warranty as standard. Will definitely be fitting more of these.
Review for Baxi 600 Combi by Tante Gas Plumbing & Heating
16th February 2018
Fantastic boiler small compact and easy to work with have fitted 3 so far love the brass inside No plastic like other boilers only error is the flue it need a clip or something but all ok does the job
Review for Baxi 600 Combi by iPlumbleeds.co.uk
12th February 2018
Love the compact size.
Love the easy to hang plate.
Love the usence controls
Hate that the pipes are to close together underneath so makes tightening up very hard.
Review for Baxi 600 Combi by JR Williams Plumbing Services
9th February 2018
Great boiler with rear piping with the ability to still fit in a 300 deep cupboard!
Easy to install with the exception of the PRV being a bit tight. Other than that, as usual Baxi produce another great boiler.
Review for Baxi 600 Combi by APJ Lawson Gas Services
9th February 2018
Some small issues like PRV and filling loop. Other than that, it's a well thought out boiler, with installers and service guys in mind.
Review for Baxi 600 Combi by R McGarvie Gas Services
9th February 2018
Great compact combi, easy to pipe up & the option for rear pipework, couple of little tricky areas being the prv & the size of the wiring block, but sure they will be ironed out in due course.
Review for Baxi 600 Combi by MB Gas & Heating Ltd
9th February 2018
The only think I’m not happy with is the PRV location , if the water inlet leaks it’s a right b**** to get in to tighten with the PRv I’m the way
Review for Baxi 600 Combi by Aqua Maintenance UK Ltd
9th February 2018
As a Gas safe engineer off over 35 years I see a lot off cupboard fit boilers from a lot off manufatures and IMHO the Baxi 600 is the best boiler out there and in fact its better then a lot of bigger sized boilers with brass hydro blocks and plenty off room for maintenance
Review for Baxi 600 Combi by M.B.Barden & Son Heating and Plumbing.
2nd February 2018
Very well designed boiler and easy to install and fit.
Cupboard fit makes it ideal for tight spaces and kitchen installs.
I would of liked to of seen an option for built in controls like other models in the range but apart from that it's great and would be happy to fit more of the 600's.
Review for Baxi 600 Combi by C.roberts plumbing and heating
31st January 2018
Being an installer my customers generally want me to recommend a boiler that’s suits their needs. So with that in mind and for ease of installation the Baxi 600 is a great all rounder. I love this particular boiler that much I have installed one in my own Home. It’s very user friendly and very quiet whilst running. I will continue to install the Baxi 600 in th future. And knowing that Baxi are only a phone call away for any after sales issues is also very comforting. The Baxi 600 has a big thumbs up from me.
Review for Baxi 600 Combi by Daniel Heating
31st January 2018
Fitted 3 now, been a Baxi installers for many years and we familiar with the Duotec and earlier 105 platforms, The 600 addresses the size and weight problem of previous models and is far more refined from a noise point of view, we are very impressed with the 600 and are starting to fit more and more in preference to our favourite Duotec model, being cupboard fit and Center flue are big selling points,I honestly feel the 600 is a quality product backed up by Baxis excellent after sales support in the unlikely event of a problem, I am confident enough to recommend it to my customers
Review for Baxi 600 Combi by Home Heating UK
26th January 2018
Fitted my first one last week
Great compact boiler
Baxi have done it again
2 things to bare in mind when fitting
1 make sure you do the blow off first
2 make all the valves on before you put boiler on the wall, it just make life easier
The boiler is whisper quite as well
Review for Baxi 600 Combi by Afterglow Plumbing & Heating Ltd
12th December 2017
Loving this Boiler, great compact fit with open therm. Like the idea with the pipe clip on the bracket works really well and saves money on having to buy a stand off bracket.
Review for Baxi 600 Combi by Diamond Heating Services
12th December 2017
Great addition to the Baxi Range. Compact, lightweight and super quiet operation. One or two niggles they need to sort including the tiny magnets that hold up the front panel are not strong enough and the boiler doesn’t lock into the jig so it’s easy to knock it off it caught (pre piped). It does have opentherm which is a bonus.
Review for Baxi 600 Combi by Crawley HVAC Services
5th December 2017
I’ve only had a play with this boiler at the dartford training center, but I’m very impressed, the opentherm compatiblity is a game changer to this duotec/platinum design, many improvements from then, but the remaha eTwist eSense control has been rebranded with baxi and is super sexy, if I wasn’t already smitten with Intergas and Vokera then I would be considering the baxi 600, it’s definitely a game changer for baxi.
Review for Baxi 600 Combi by Nestor Plumbing & Heating
4th December 2017
Great boiler, cupboard fit, multiple flue options, jig available, can run tge pipes behind. Still plenty of room inside to work, great price too.
Review for Baxi 600 Combi by MJE Plumbing Services
2nd December 2017
Fitted 2 baxi 600 now and the quality is fantastic, just what you expect from baxi. The ability to pipe down the back of the boiler is a massive bonus. Helping keep the boiler a more compact and cupboard fit appliance. Looking forward to fitting more in the future.
Review for Baxi 600 Combi by iGas Heating Ltd
1st December 2017
Great little Boiler. Basically a Duotec but everything made smaller for Cupboard fit. Easy lift compared to Duotec. Impressed
Review for Baxi 600 Combi by PMA Gas Solutions
18th November 2017
Great cupboard fit boiler, fitted my first one this week. Customers were happy too.
Easy to installer and looking forward to 1st service
Number video reviews: 2
Hi, I'm Darren from Sunrise Plumbing and Heating. Today we've installed a Baxi 600, which is a 24 kilowatt. And they use sense controls.
This is our first install on the 600, and it will be the first of many. Nice boiler to install, cupboard fit. Nice off the wall, so we can get the pipework behind the actual boiler. So the boiler itself ... very, very easy to install.
Yeah, definitely recommend the 600 to anyone that's looking for a cupboard fit boiler. Easy to install, quick release filling loop. Brilliant.
Hi, this is Dave from DCB Plumbing and Heating doing a Tool Talk review for Expert Trades.
Today, I'm gonna be reviewing this brand new Baxi 600. This is actually the second 600 that I've fitted. I didn't want to do a review on the first one. You're just getting to know things, you don't really know how things work. It's nice to get into it and see what's going on the first time, and then, on the second one, you've got a rough idea what's going on, so you actually take a bit more notice of the goods, the bads, the what could maybe change, what couldn't get any better, shall we say?
We'll dive straight in. We've got to take the case off, we've got a couple of screws just under here. Simple, very easy. No problems. I already pre-loosened 'em. Then we get into the meat of the boiler itself. This one isn't commissioned, this one isn't working. When it is working, I would like to say that it is very quiet. We've got some really good insulation and things on the inner case and good sealing. The actual baffle inside, that draws the air in, has a silencer built in, which, again, makes a fan noise really quite quiet. Stainless steel heat exchanges do normally have a little bit more noise to them than some of the aluminium ones, but this one, you can't tell. You can't tell.
First thing, unfortunately, we're gonna have to say is a small, little problem with it, at the moment. I believe that something might be done about this, but when you wire up the boiler itself, we have some very, very small magnets, which go onto these two. If you just have a few wires just in the wrong place, you can't always push it back. There is a couple of tips for that one. One of the ones that I found is the pump lead, if you put it under the pressure valve, pressure gauge's wire, and behind the gas valve wire, that stops it from dropping in front of the gas valve. That's one of the wires I've found does do a lot of damage. The other one is when you pull it down, with this wire being quite short, the head of the diverter valve pulls forward. All you've got to do is push that back and push it up. It's not too much of a problem because the case holds it there anyway. It's just something that there's a few wires often in the way, which is just something to look out for when installing.
Right. Let's get to it. The main points I'd like to say about this boiler is, of course, the stainless steel heat exchanger, now with a centre flow. You can't really go wrong. This is new, cool touch technology where if you go to Mrs. Miggins' house, for say, to service the boiler. It's a couple or three years old. You're gonna be taking the burner out to check all the seals, make sure everything's intact and how it should be. She's had it on, you get there, it's warm. On old boilers, you wouldn't be able to undo your screws, get it out because everything would be too hot. Whereas, in this case, it does get lukewarm, but lukewarm is all it gets. So that's a good, little feature. Whether it's necessary or not, I don't suppose it really matters, but I think it's a good, little featu.re to have, just for us service guys.
Big, big condense trap. Making sure, freezing up on the condense side's a lot less common than if you've got a tiny, little trap, just dripping a little bit of water out. So that's a good part of the boiler.
There is, as you can see, very little in the way of plastics or anything like that inside this boiler. Everything you can see is copper. Copper pipework. You've got your brass hydro blocks. You've also got everything else in here is brass, completely. All of the hydro block is brass, and all your pipes are copper. You can't really ask for much more than that if I'm totally honest.
Very easy to set up when you actually do get it running. Very easy to work with. Just having a couple of little dials on the front means that to get into the settings and stuff, it's fairly straightforward. Once you've done one, you've done it all, if you know what I mean?
Right. We'll drop a little bit lower, now, at the moment. Something else I'd quite like to just add into there. When installing, it comes with a bracket, instead of a jig. Isn't a problem. I've moaned in the past that I like my jigs. I still do, of course. I do believe you can actually buy a jig for this boiler. So if you don't like the hanging bracket idea and you still want a pipe jig, you can buy one. I believe they're in the region of about £25, £30. So we're not talking big money. So that's fantastic to know.
We'll go down here. We have the new, keyless, non mess around filling loop, whatever you want to call it. It's very, very simple. It's just you pull the green, little lever downwards and that lets the cold water into your central heating side. One little, tiny problem with that is it goes into the centre and goes higher. When it goes higher, it is actually quite difficult to get into your cold top nut, and the return central heating top nut. I haven't really found that a problem. If you just grease up the O rings when you put it on ... You can take the clips off, get it piped up, take the clips off, remove it, do your tightening up, and pop it back on. To be honest, it's a minor inconvenience. It's something to maybe talk about, but it's not really an issue. If you're greasing them O rings, that's gonna slide off dead easy and slide back on dead easy. That's what O rings need, love and care.
Again, we've got some great features. This one is absolutely fantastic. This is a drain point. The drain point, being at the lowest point than anything else, that you're not worrying about, "Oh, can I drain it?" Getting water onto the circuit board. No. That's all gone. Bang, there it is. Turn your valves off. You want to drain it, you can drain it. You're not thinking about where the actual drain point is and where water may or may not leak to. Fantastic idea. Absolutely fantastic idea.
I'm gonna have to finish on a couple of things. One is another minor inconvenience, is the pressure release. Where the pipe comes for this pressure release pipe you have, it's quite high up and it's in the back. If you don't do that joint first ... again, it's a minor inconvenience. I know some people do it last 'cause it's not really as necessary to get the boiler up and running and I've done it myself, is you leave that one to the very, very last point. On the old boilers, you didn't get it until you put the boiler on the wall. Obviously, in this one, you're actually putting the boiler on the wall to start with, so that issue comes straight into play. But if you get that done first, you can easy get it tightened up. Again, it's not an issue, it's just a talking point.
It's great to have, obviously, your pressure test nipples on the gas side, as well. Fantastic.
The final thing I really want to say is it's very light. I think, personally, when you get your case back on, I think it's a pretty good-looking boiler. It's very light, very easy to install. You've got the same flueing system that you've got with any Baxi that you install, the multi flues. One small problem I do have with the multi flue is the actual first one of these I fitted, a couple of days ago, was with what's called a plumbing management kit. A plumbing management kit gets dirty airs, your rubbish airs, away from windows, doors, patio areas, anywhere that might be of nuisance. Let's put it that way.
With the Baxi range of multi flue, you have to buy a separate flue, which isn't a problem if you know you're gonna need the flue to start with. My only issue with that would be if you instal a boiler, it's higher than two metres, it's not in anybody's way, but next door neighbour complains or it's nearest your door and you think, "Oh, I don't really like the steam coming from the boiler's flue." You want to get away from a particular place. You would have to re-buy a new flue. I believe you can buy ends for it, but it's very difficult to do. You've got to take out bits and things like that, which on other manufacturers, you can just literally install or take a little piece off 'cause it's on O rings or just a little screw. You take it off and then you can add it actually at a later date.
Like I say, it's not a problem when you know you need it because you just buy that flue and bring that flue with you, and fit it as normal. But if you are gonna need one at a later date, obviously, you wouldn't know you need it. It's gonna be awkward. Just a minor inconvenience, again, 'cause it's not very often that I would use a plumbing management kit. It's not always necessary, so it is just something maybe just for ... again, it's a talking point, rather than an actual problem. It's just something that could maybe be altered in the future.
All in all, I think this is a fantastic new edition to the Baxi range. I'm actually quite proud to say that Baxi have possibly the best range of boilers going. The 200, the 400, the 600, the Duo Tech, the Platinum, the Eco Blue Combi Plus, and the Eco Blue Advanced. That's just the Combi range, there's seven there. All of them different, all of them fantastic boilers. Everything's been made of a high quality.
So I'm a Baxi-approved installer. If they carry on making boilers like this, I will still be a Baxi-approved installer because this is definitely the way forward. The fact it's small, the fact it's light, the fact you can actually get the pipes up the back with no extra piping jigs, or anything like that. Centre flue. This is the way forward.
I'd just like to say a massive thank you to Baxi for coming up with something like this. When you're designing your next one, get in touch. I'm sure we could maybe sort of a few things out if you need me to test anything. I'm cheap. You know, I don't cost too much. Maybe a hotel night and a couple of biscuits. I'm sure we'll sort something out.
Anyway, thanks for watching, guys. I hope that's been a good enough review. If you are a Baxi installer, I do recommend at least trying one because what's to lose? What's to lose? The fantastic part of it is it's light, it's easy to instal. There's not much else I can say to be quite fair.
Thanks for watching. Take care, guys.
No questions